Illustration: Twitter card
An official website of the State of Georgia.
The .gov means it’s official.
Local, state, and federal government websites often end in .gov. State of Georgia government websites and email systems use “georgia.gov” or “ga.gov” at the end of the address. Before sharing sensitive or personal information, make sure you’re on an official state website.
Still not sure?
Call 1-800-GEORGIA to verify that a website is an official website of the State of Georgia.
March 28, 2017
In my last post, we introduced Twitter Cards and looked at how they can add beneficial structure to your social media content. Now, let’s take a deeper dive into how you can use Cards in the best way possible to get the most bang for your effort.
Once you have content posted and we have configured Twitter Cards for your site, you can customize how you want your content to appear in the Twitter Card.
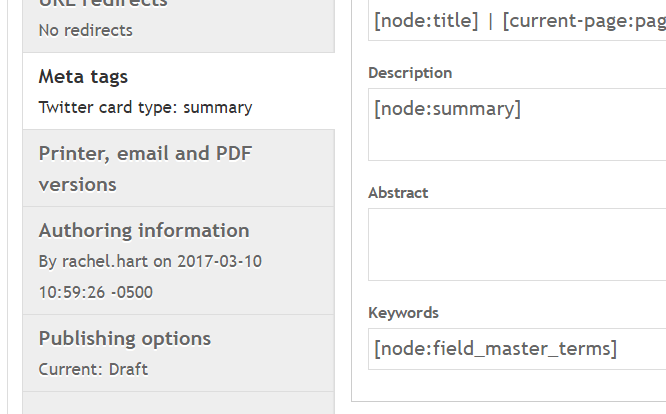
Your Twitter Card customizations will appear in the Meta tags tab just above the Publishing options in your content.
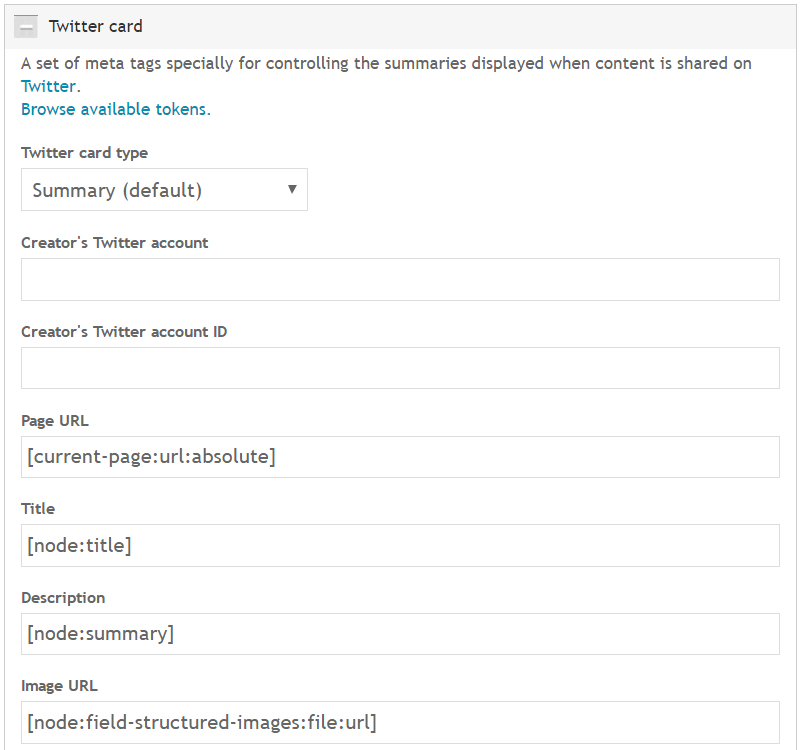
When you expand the Twitter Card settings, you’ll see many options to customize how your content will display in the Card. Although all of these options are available, they are not always necessary. Only edit the settings that apply to your card. And if you don’t change any settings, Twitter will just use the defaults.
For all Meta Tag content, including the Twitter Card fields, don’t assume content will “automatically” populate from your WYSIWYG or Columns into the Twitter Card unless there is a token — like [node:title] or [node:summary] — representing it in the settings already. Therefore, even if you have an image or video in your content, you will need to manually enter the corresponding URL in order for it to appear in your Twitter Card. And the good news is, Twitter can read both an absolute and relative URL.
To customize your Twitter Card, you might consider editing:
After you have customized the Twitter Card fields you want, publish your content like you normally would. Your content will appear the same on your site, but when you share that content on Twitter, you will see your new structured content.
In order for Twitter to provide a secure experience to their users, Twitter has set regulations for video content.
For a video to show up in a Twitter card, you need to pull the right URL. In YouTube, hit the “Share” button below your video, then “Embed.” Make sure you uncheck “Show suggested videos when the video finishes.” Then, you can find the link inside of the iframe text provided.
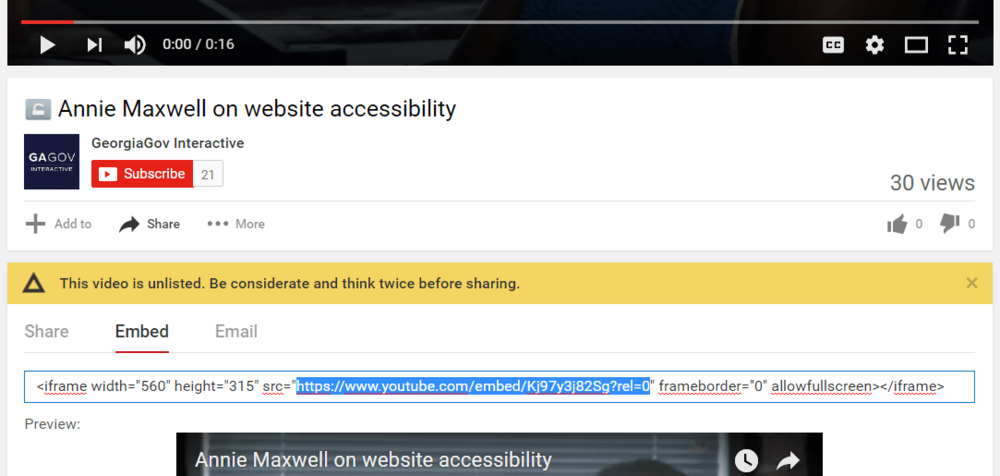
Copy everything inside the quotation marks immediately after “src=” and paste it into your blog’s meta tags section.
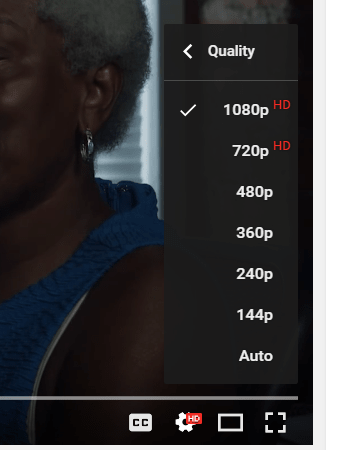
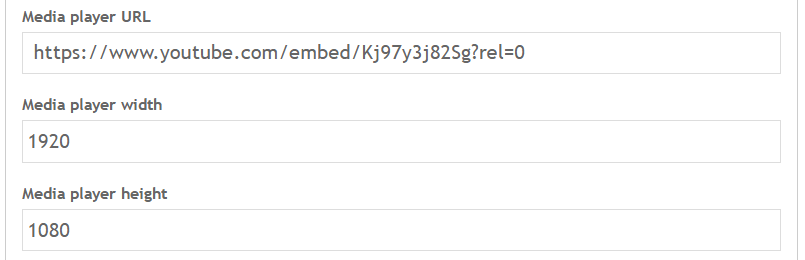
The Twitter Media Card also requires that you provide a width and height for your video. If you’re not sure what the video dimensions are, click on the gear at the bottom-right of the video, then click Quality. Whatever number is at the top of the list is your video’s height.
Some common video dimensions are 1920x1080 and 1280x720, but YouTube provides a full list of accepted video dimensions.
When you enter the dimensions into your blog’s metadata, make sure that you list the larger number as the width, and write only the number (not “px” or “pixels”).
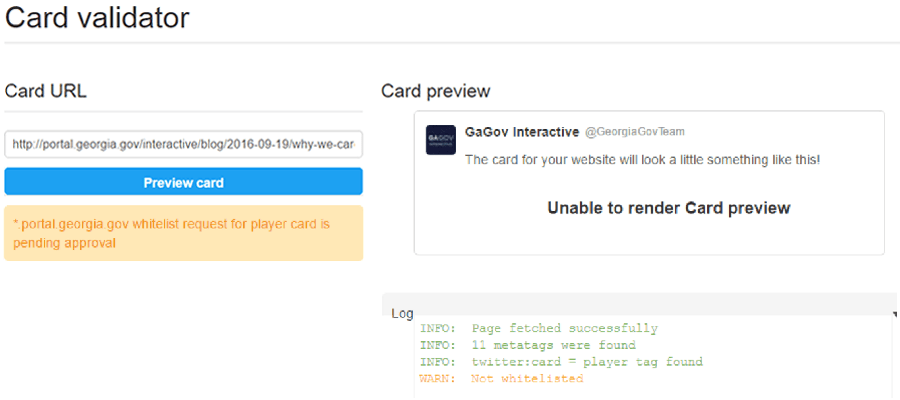
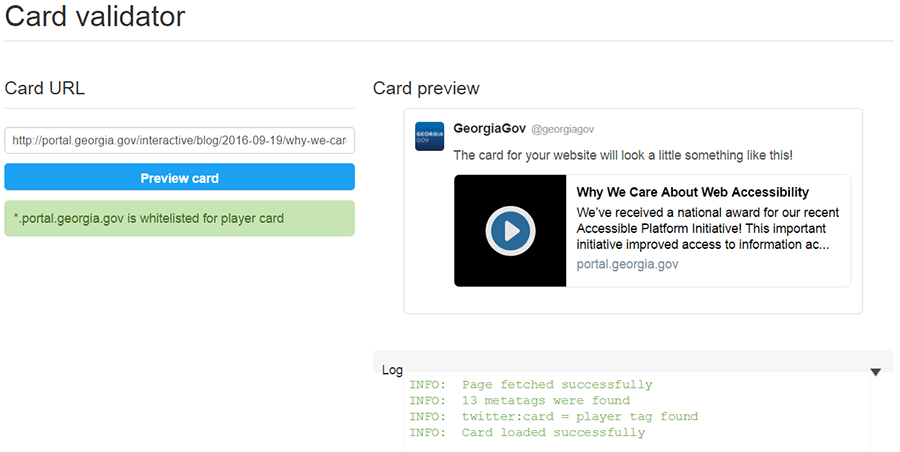
Before using the Media player link in the Twitter Card settings on your site, you must submit your site for approval through Twitter. You can find out if your site is already approved by using the Card Validator. If your site is not approved and you try to validate a link using a media card, you will get an “Unable to render Card preview” error with information that you have not yet been “whitelisted”. That’s just a nice way of saying your site is approved for sharing on Twitter.
To get whitelisted, a Request Approval button will appear for you to submit your link. Fill out the information requested and submit. It takes a few business days to receive approval. Check your email for approval updates and other information regarding your validation request. And that’s it! Once Twitter has whitelisted your site, you won’t have to go through the approval process again.
Once you’ve enabled Twitter Cards on your site, all you need to do is Tweet the link! If the link is the last part of your post, it will automatically be replaced by the card and no longer show once your Tweet is published. And if anyone else Tweets a link to your site, it will automatically create a card for them as well!
Twitter outlines a simple, 4-step process for adding the Twitter Card meta tags to your site. But before picking which Twitter Card to add, you might want to learn more about meta tags and web crawlers with Twitter’s Getting Started Guide.
Twitter Cards are simple to add to your site but can deeply impact your engagement on Twitter.
We just added Twitter Cards to our site to make sure our content managers get the most out of our web content. It’s our responsibility to create websites with powerful content and train our content managers to do the same. It’s also our responsibility to offer the same powerful, structured content on our social media accounts and other outlets where we interact with our users.
If you want Twitter Cards added to your site, simply put in a Support Ticket with us. We’ll be happy to set you up with more structured content for your social media.
Twitter Cards, Part 1: Structure Your Social Media Content